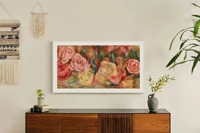
Welcome to the world of personalized digital art for your living room. As an owner of an art TV—such as The Frame by Samsung or CanvasTV by Hisense—you appreciate its ability to transform a space, not just as a television but as a digital canvas. This guide focuses on creating custom artwork for your art TV using Pixelmator Pro, with principles that apply broadly to any graphics software.
If you’re new to digital art, don’t worry. We’ll walk you through the process in clear, manageable steps. We use the very same process for our curated selection of artwork, meticulously optimized to meet the Frame TV’s technical requirements.
Ready to transform your TV into an artistic focal point? Let’s dive into the technical nuances of The Frame TV and ensure your artwork becomes a seamless, stunning addition to your living space.
Understanding 4k Art TV Display Requirements
Let’s prepare our digital canvas. The unique displays of 4K art TVs necessitate specific considerations for artwork. It’s important to understand these to ensure your art fits perfectly and looks its best.
Resolution is key. The resolution of a 4K TV is 3840 × 2160, which allows for detailed and sharp imagery. When creating or selecting art for The Frame, high definition should be your standard to maintain visual clarity.
Aspect ratio is equally important. All 4K TVs also use a standard 16:9 aspect ratio. Deviating from this ratio can result in stretched or improperly bordered images.
Creating artwork with the correct 16:9 aspect ratio and resolution gives you the option to display it with or without a mat, enhancing its framed appearance. The Frame provides various mat sizes and colors, offering further customization to match your décor.
When resizing images, the choice of resampling algorithm is critical. Options like Lanczos or Pixelmator Pro’s “Super Resolution” are essential for maintaining detail when scaling up. These tools help preserve the integrity of your image, ensuring crisp lines and vibrant colors.
In summary, aim for a 3840 × 2160 resolution and a 16:9 aspect ratio for your artwork. Choosing the right resampling algorithm will preserve the quality of your art as you adjust its size. With this foundation, you’re ready to create art that not only fits The Frame TV and CanvasTV perfectly, but also enhances your personal space.
Preparing Art for The Frame TV and CanvasTV
With a clear understanding of The Frame TV’s display requirements in our toolkit, let’s proceed to the actual process of preparing your artwork. We’ll be using Pixelmator Pro for this walkthrough, but the core steps are applicable across most graphic editing software.
1. Loading the Artwork in Pixelmator Pro
We found an intriguing artwork online, which we’ll use for this demonstration, and saved the image as Samson Flexor - Geometrico I - Full.jpg.
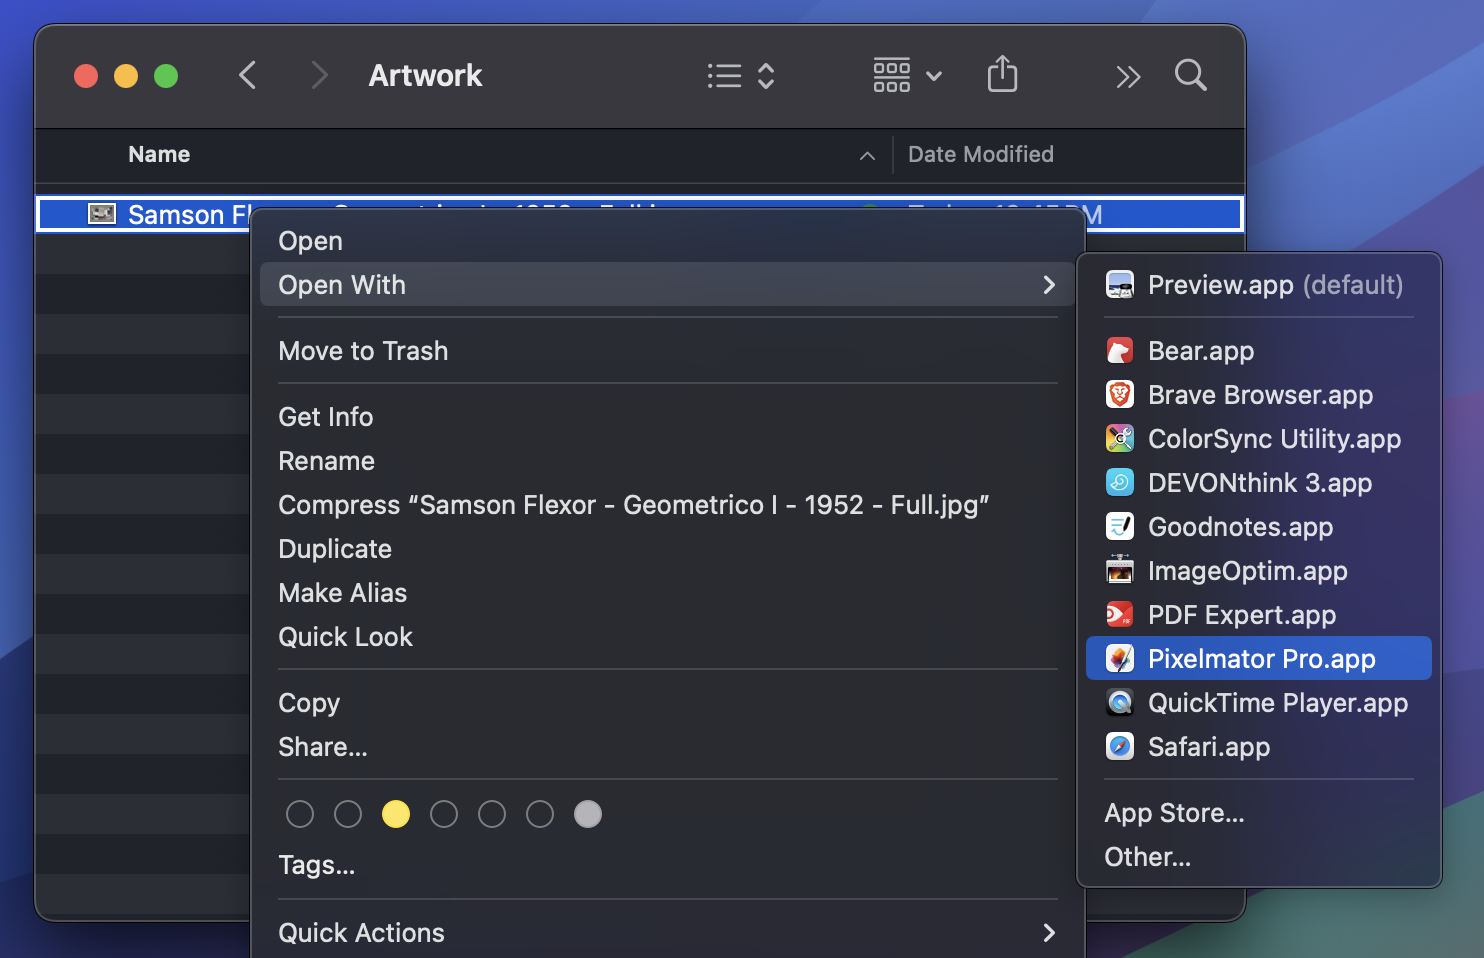
Open the Image in Pixelmator Pro.
Right-click on the file and select 'Open With > Pixelmator Pro' from the context menu.
This action loads your image into the workspace of Pixelmator Pro, ready for editing.
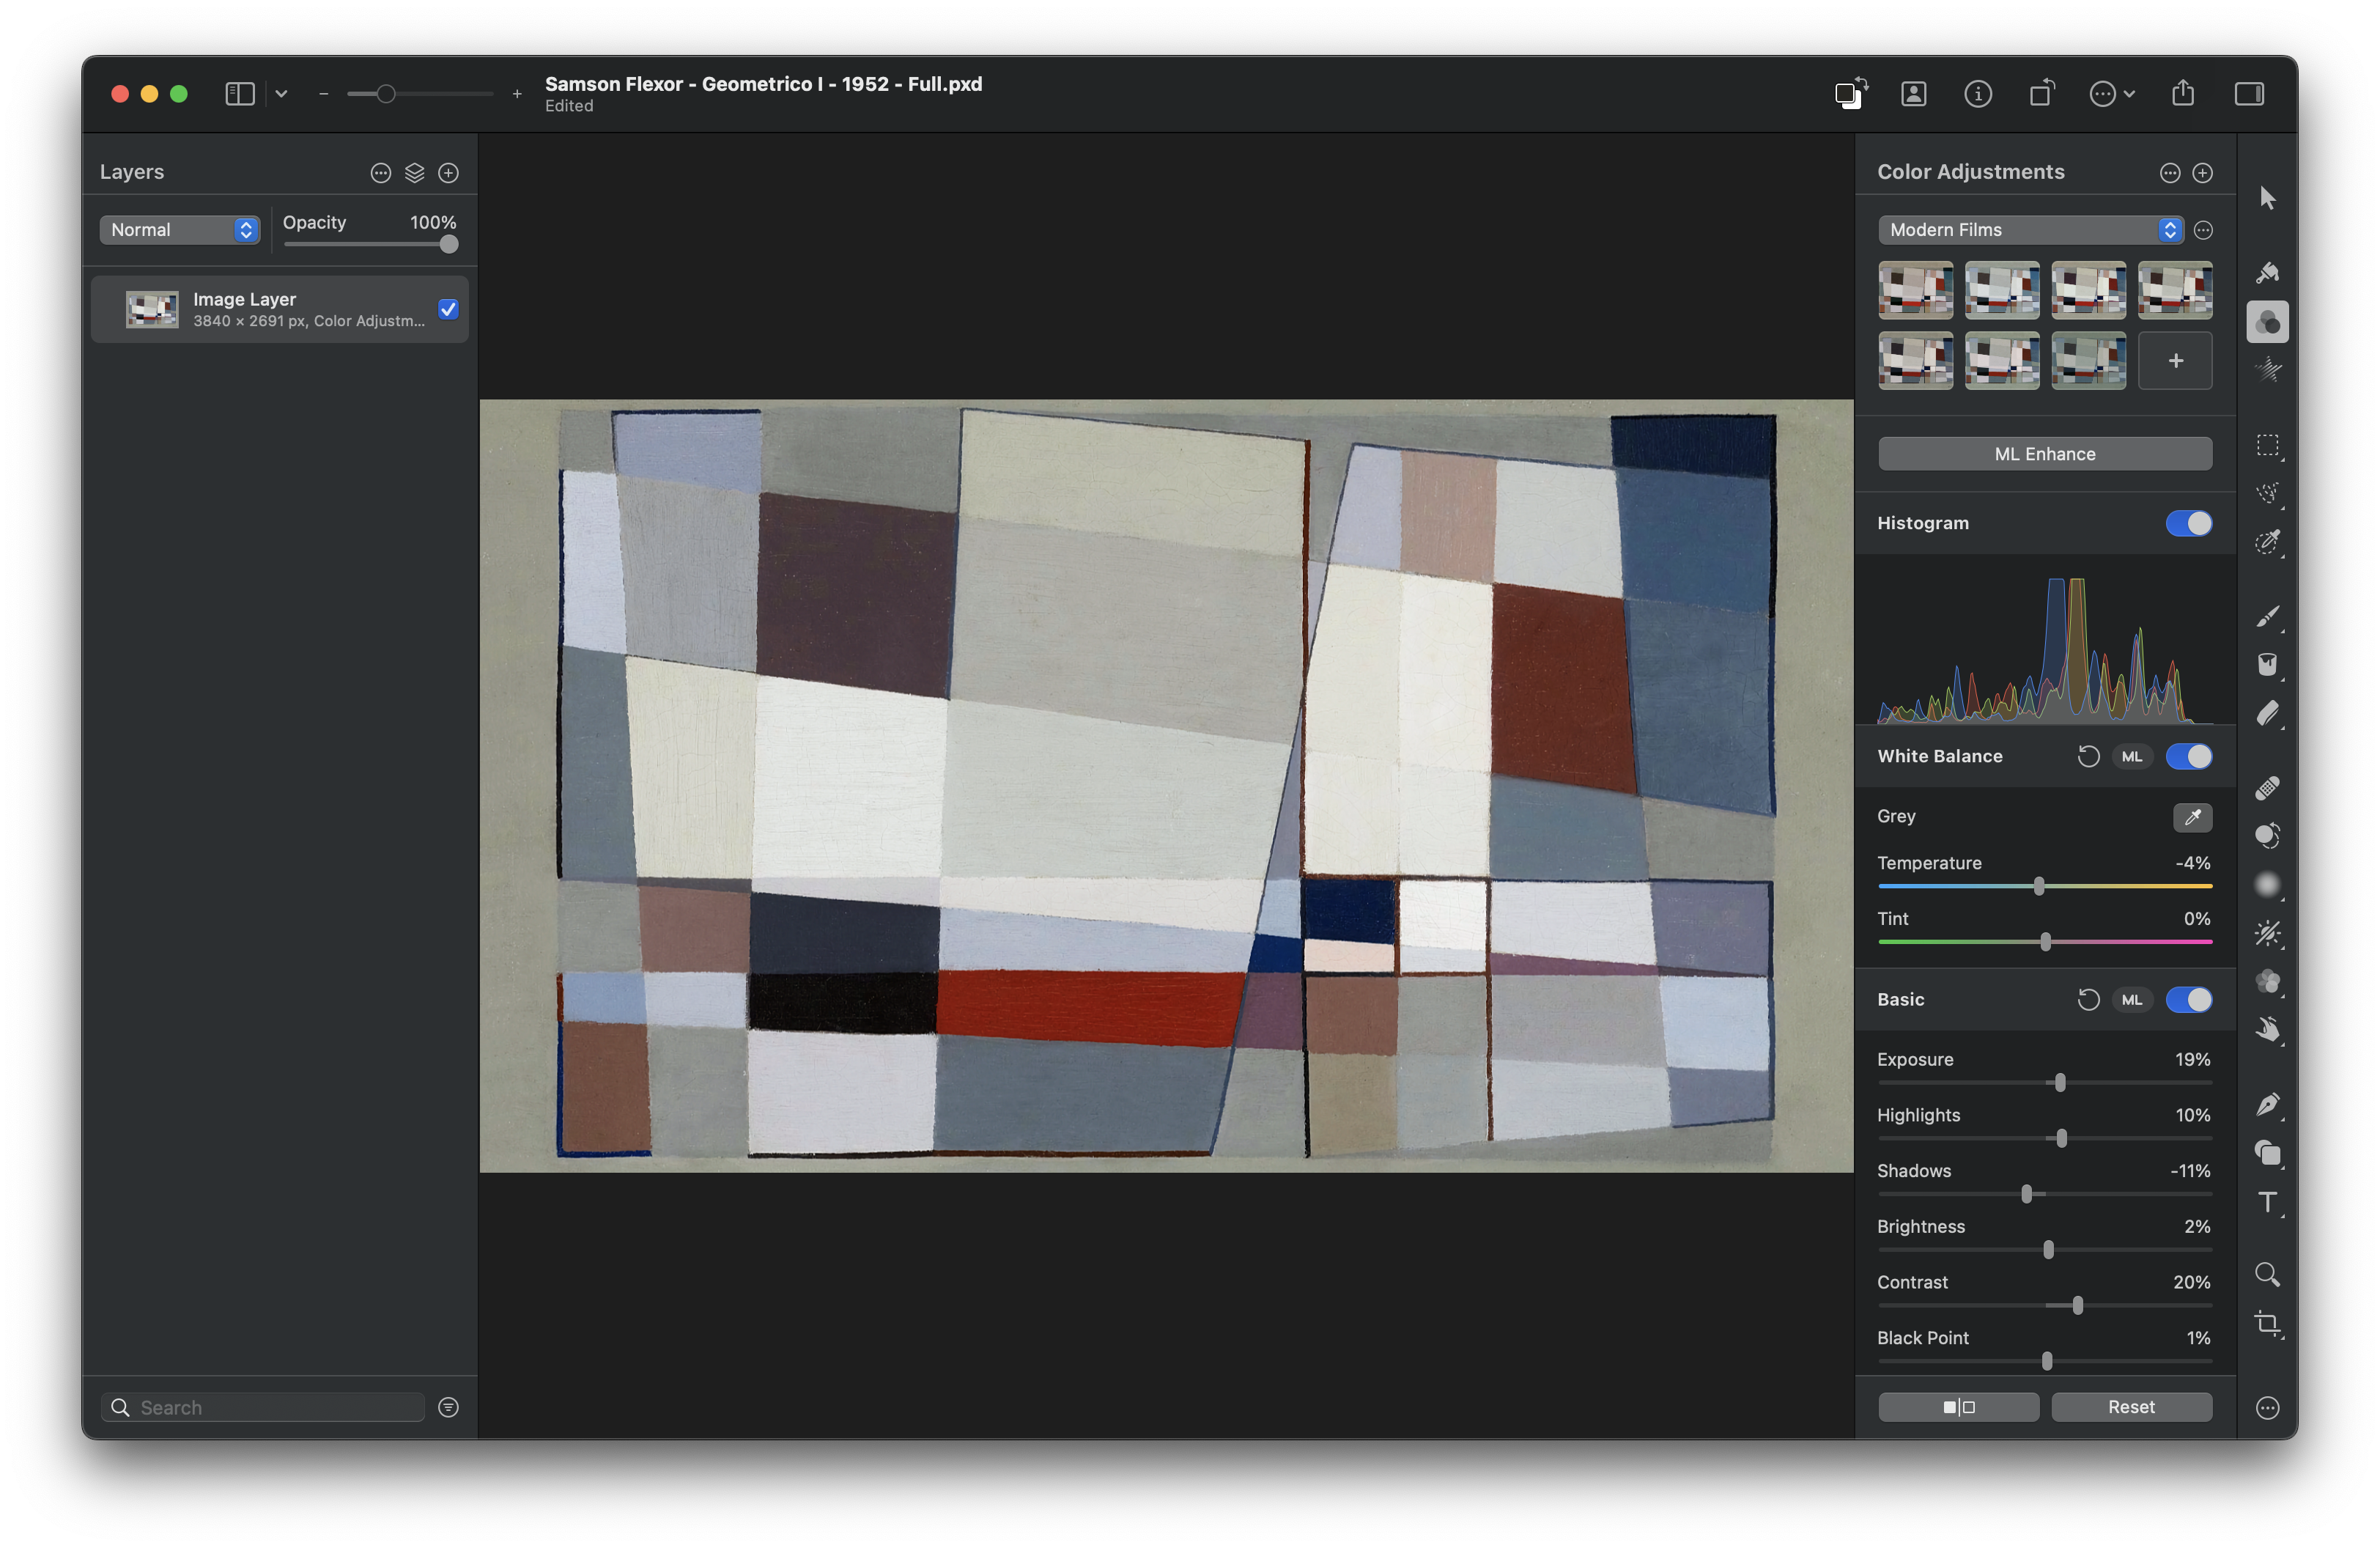
2. Color Correction
The original image appeared a bit yellowed, and the colors weren’t as vibrant as we desired. To address this, we corrected the temperature very slightly to remove some of the yellowing. We also increased the contrast to make the colors more vivid and bring the artwork to life.
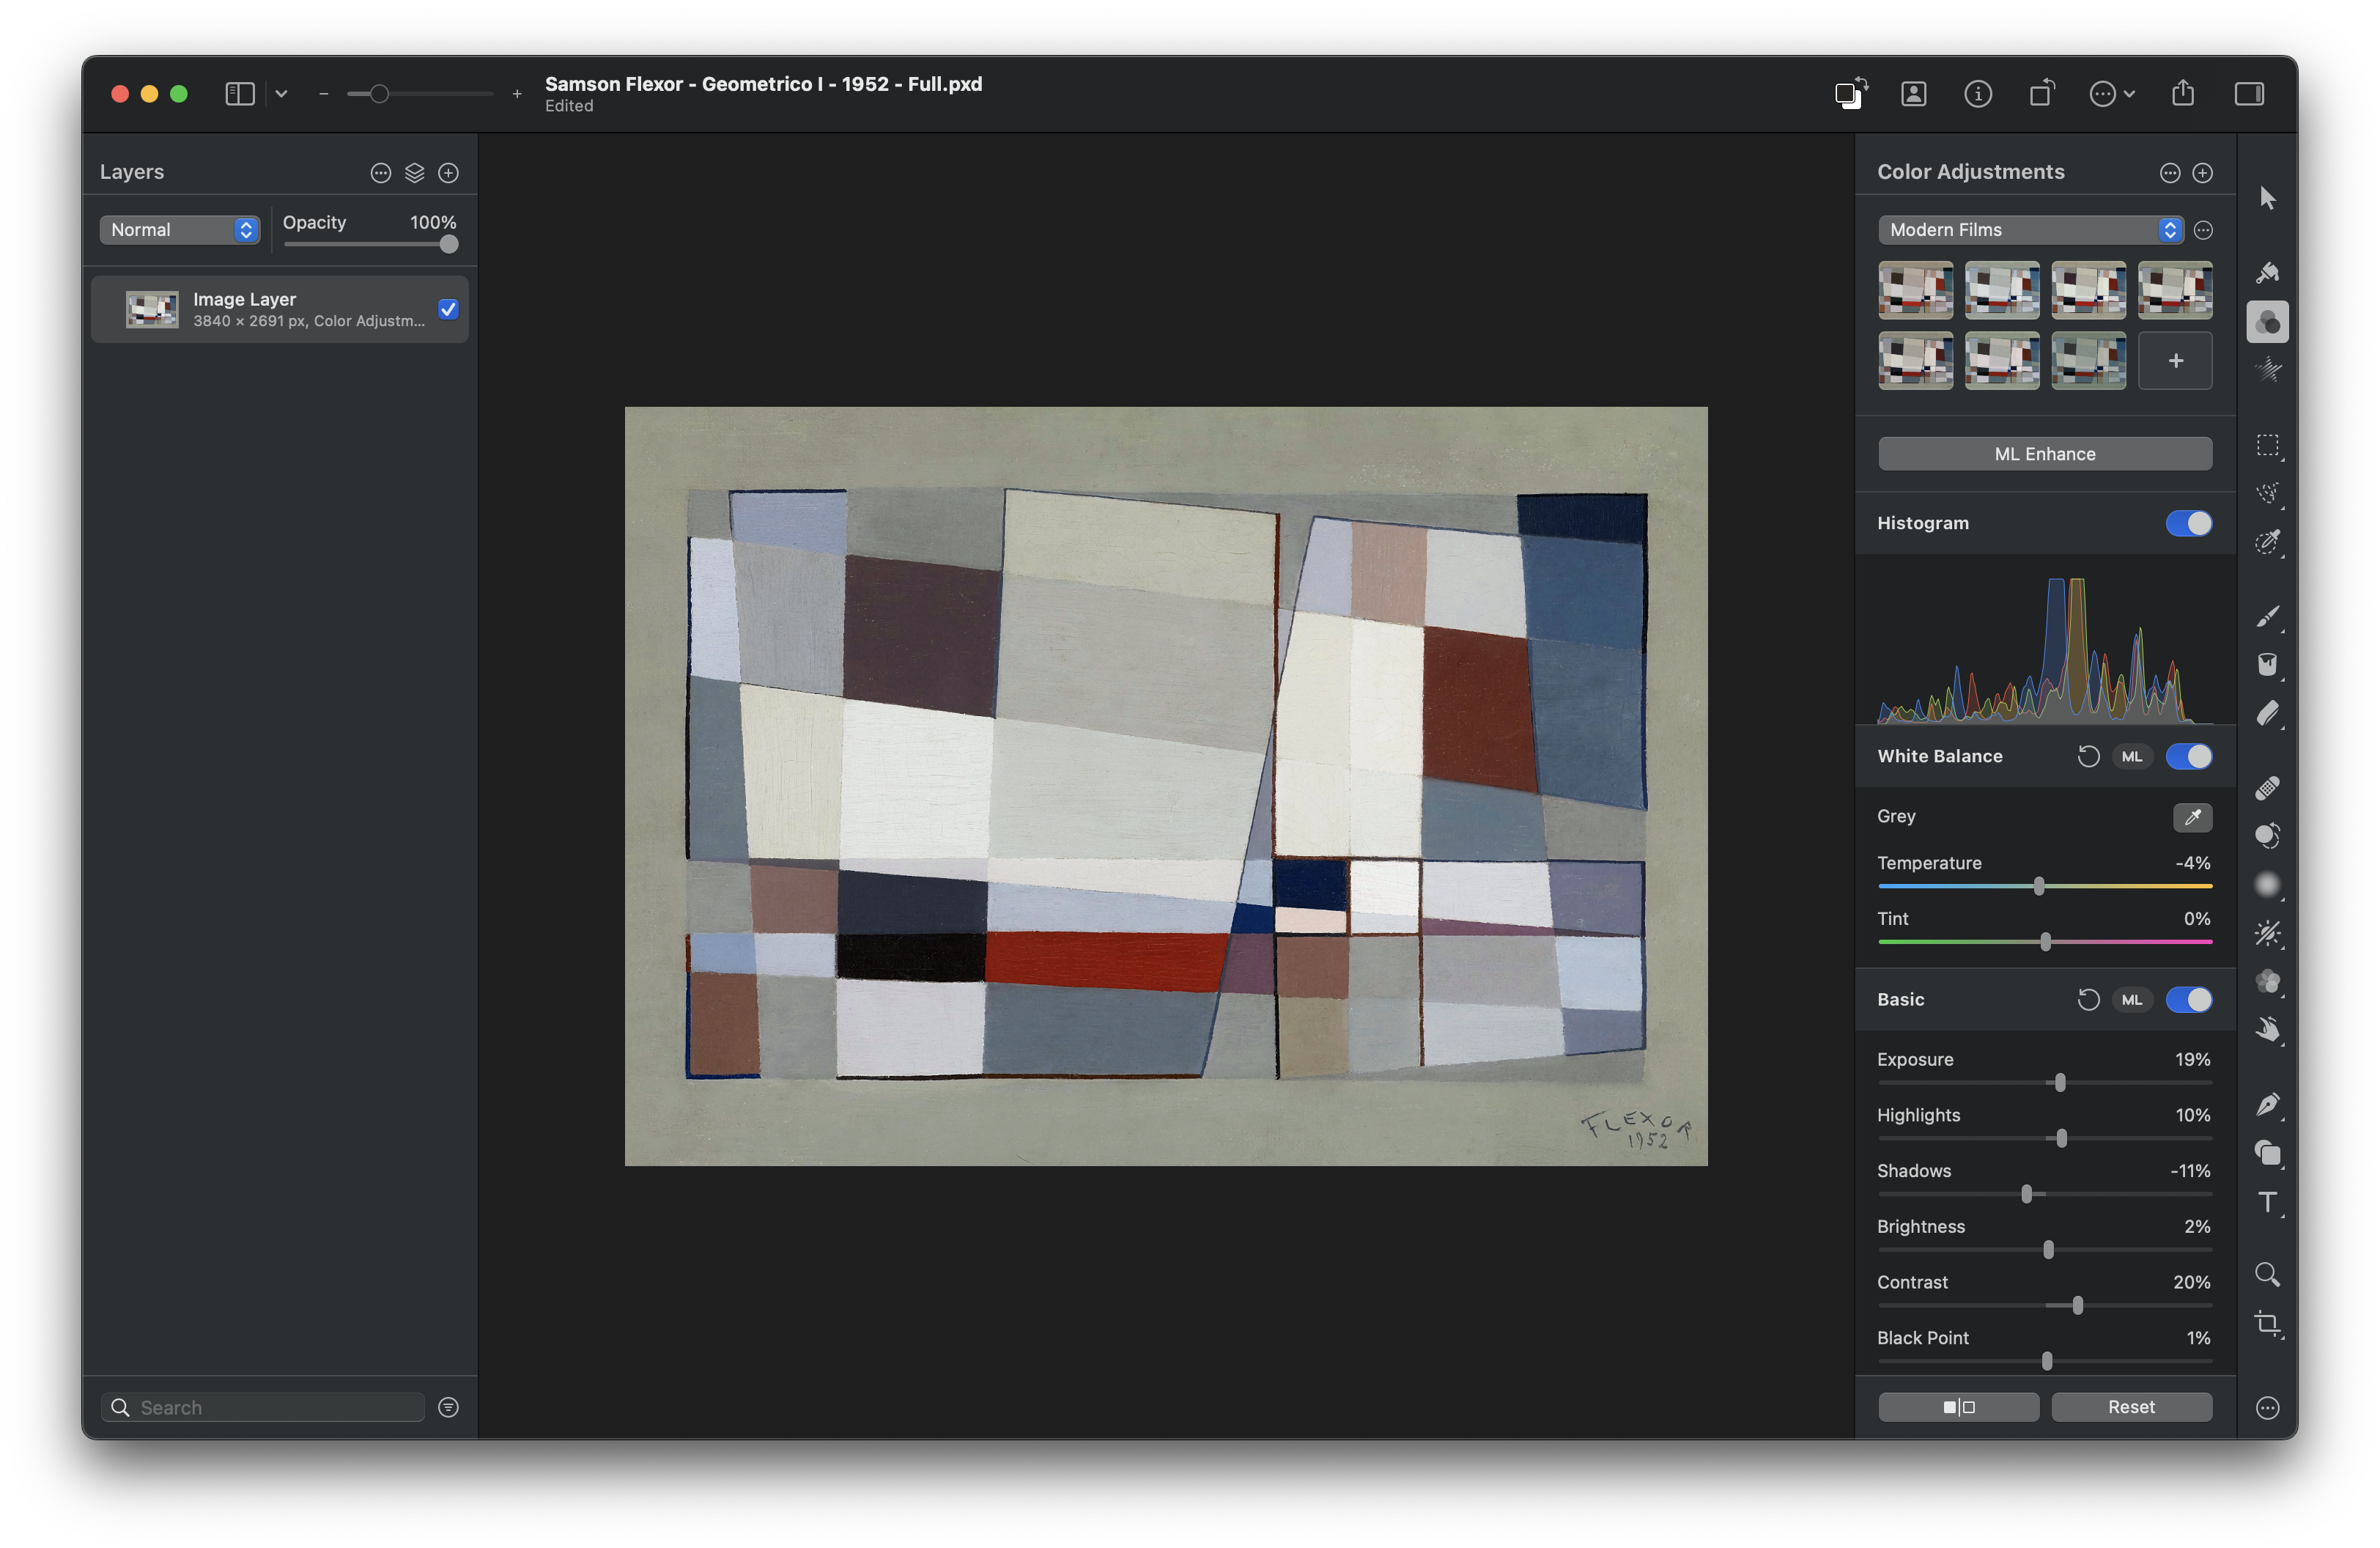
3. Changing the Resolution
Ideally you will begin with a larger than necessary image and resize it via resampling to obtain a smaller image. However, in our case the image is smaller than the required 3840 × 2160 pixels, so we need to upscale the image.
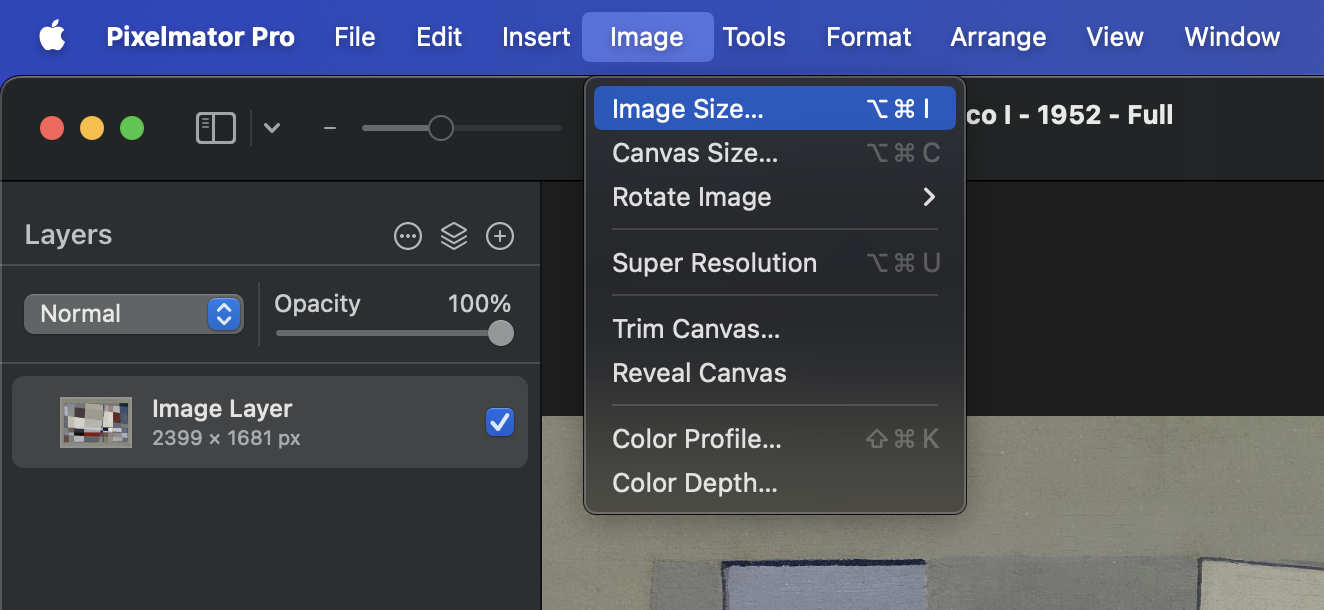
Resize the image.
To do this, navigate to the 'Image' menu and select 'Image Size…'.
Adjust the width to 3840 pixels.
With 'Scale proportionally' checked, the height should automatically adjust to maintain the aspect ratio. In our example the height will adjust to 2691 pixels, offering ample space for cropping later.
If your original image particularly wide, you may need to adjust the height to 2160 pixels first, allowing the width to adjust automatically.
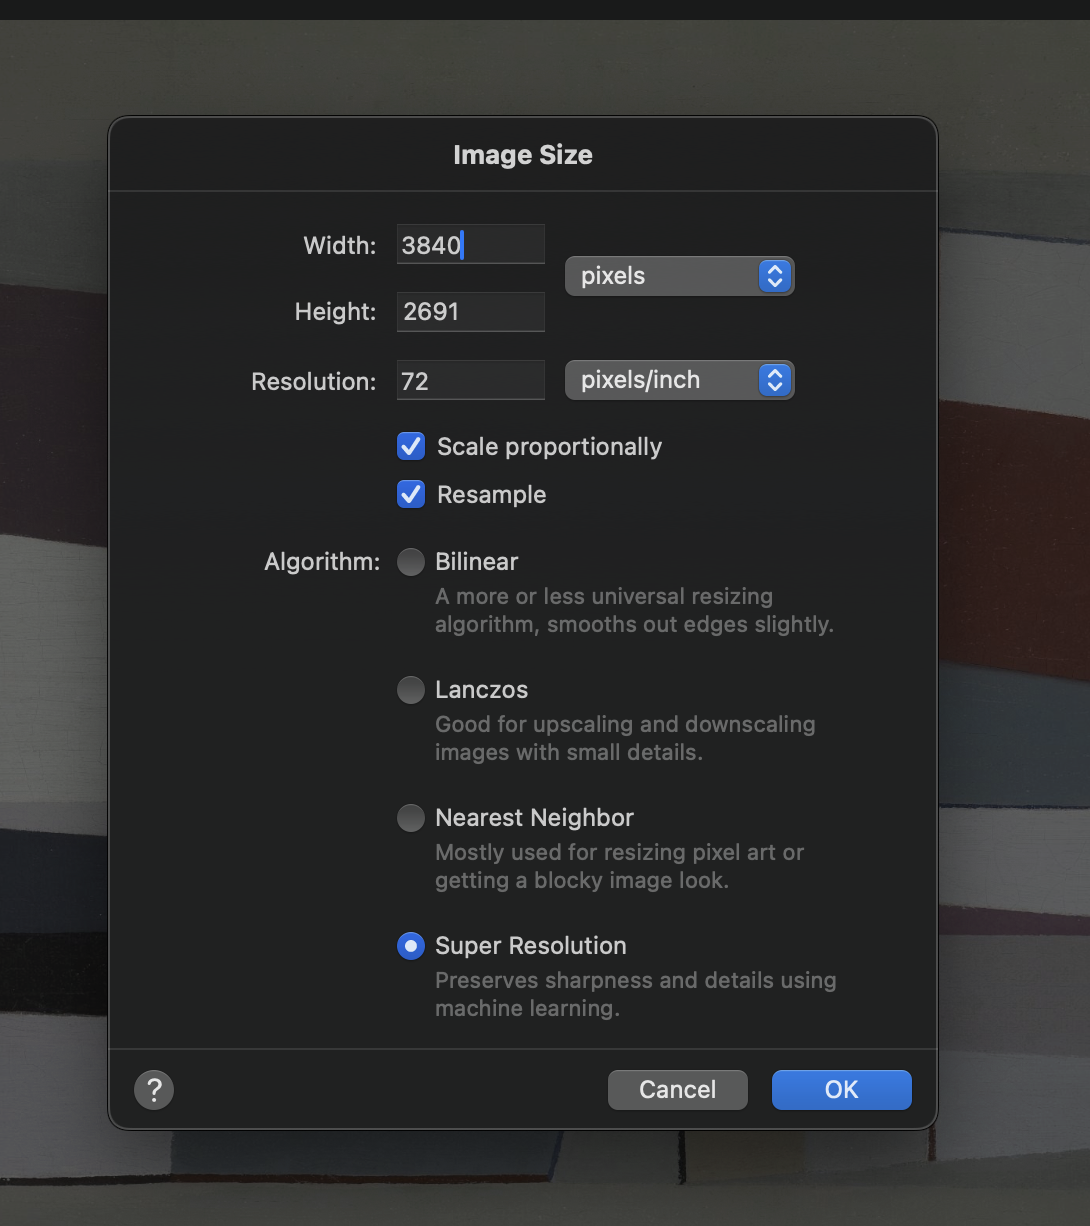
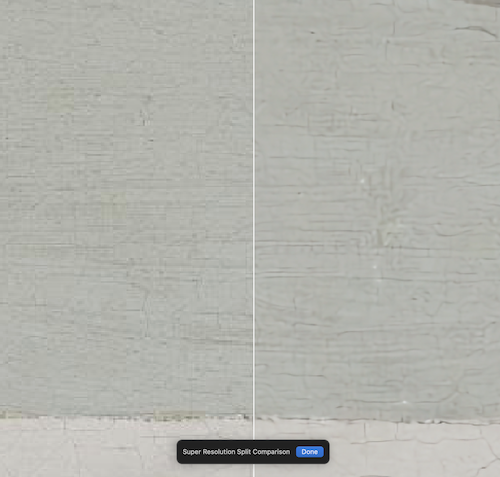
Experiment with different resampling algorithms like Bilinear or Lanczos, if available in your software.
Pixelmator Pro's default 'Super Resolution' algorithm often provides a good balance of clarity and detail.
4. Refining the Resized Image
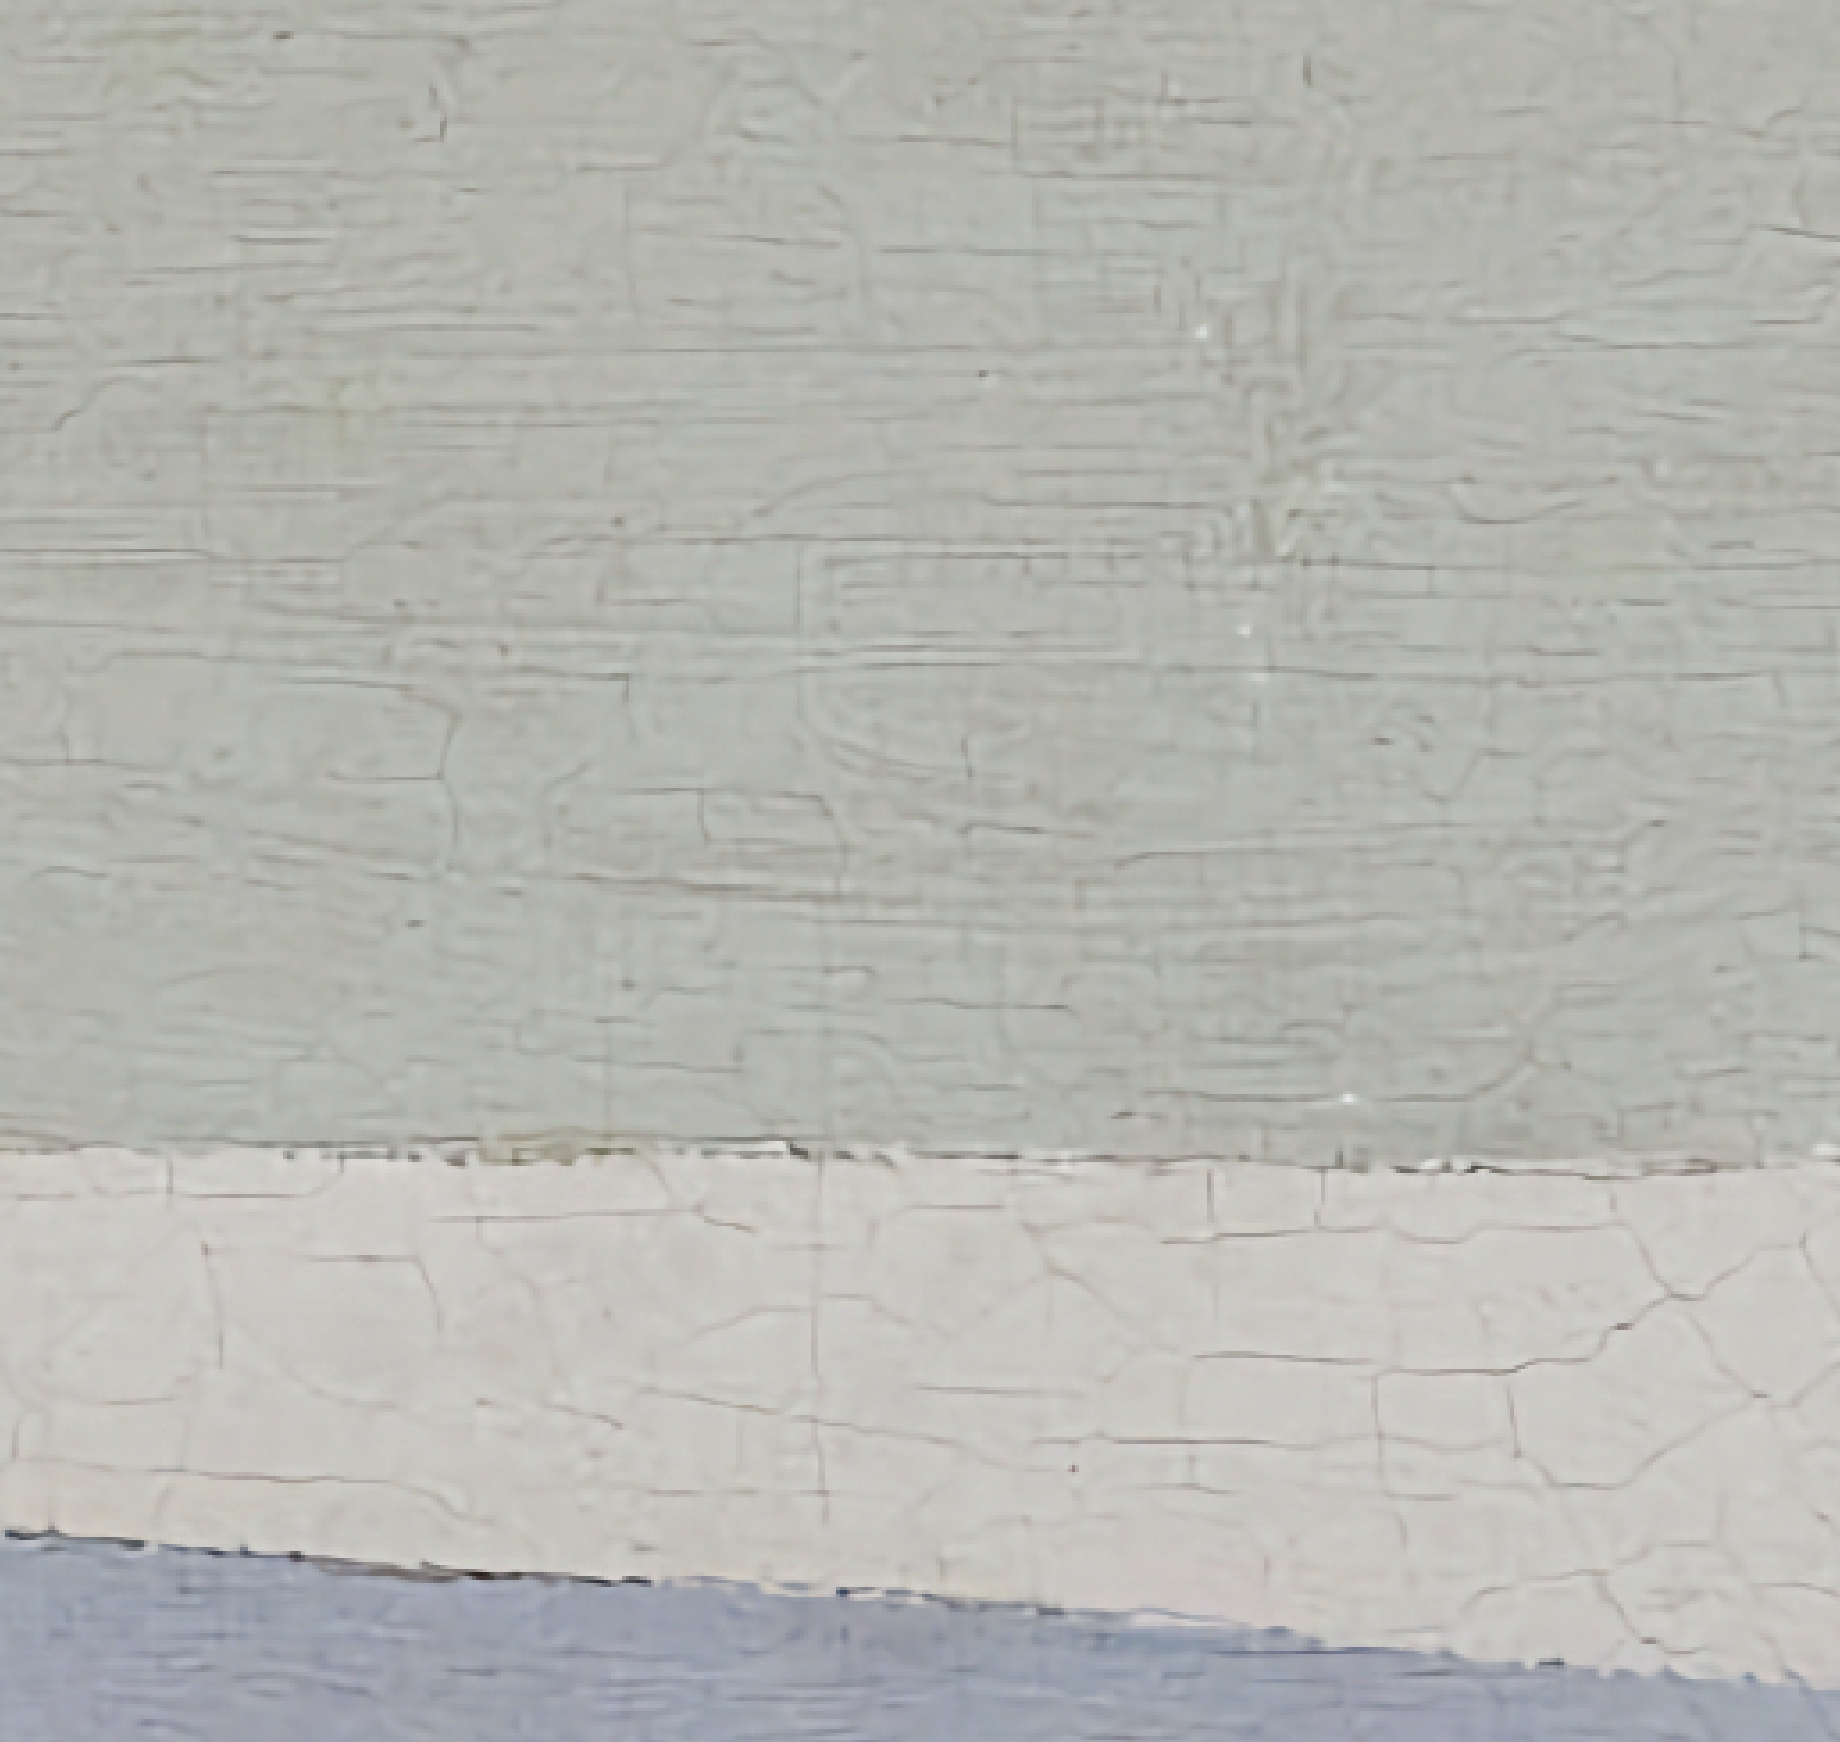
Inspect the image for any loss of detail or blurring, particularly in areas with fine textures. We noticed some details, like the cracks in the paint, became less distinct after resizing. Applying a sharpening filter helped restore these details, enhancing the overall sharpness without introducing noise.
5. Cropping for a Perfect Fit
Adjusting the aspect ratio is crucial for The Frame TV and CanvasTV.
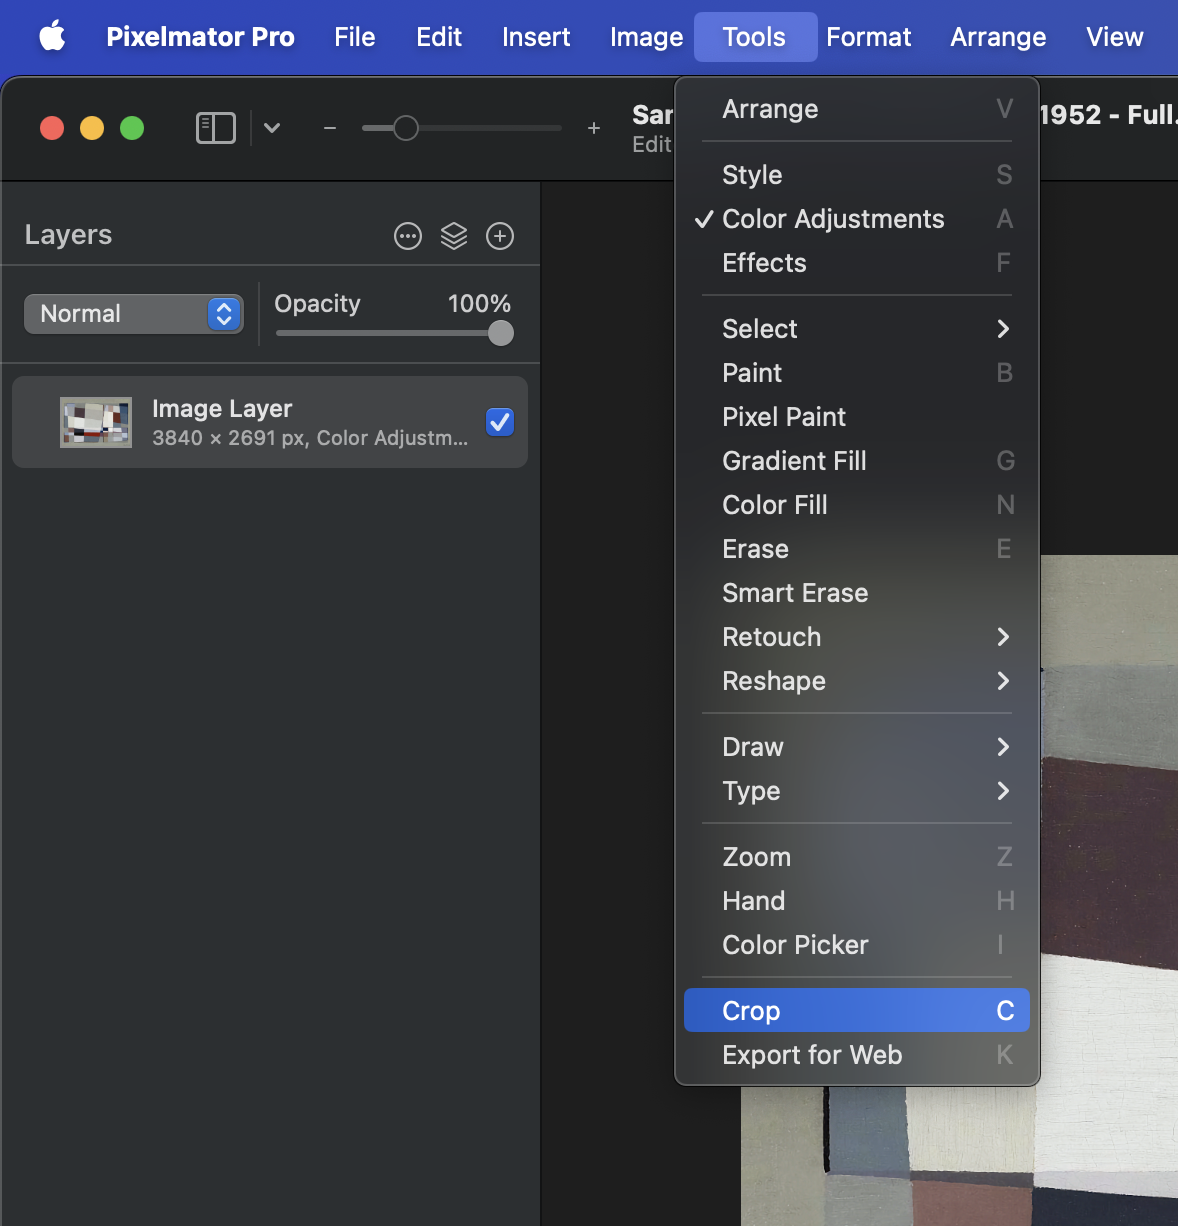
Crop the image.
First, select 'Crop' from the Tools menu.
Choose 'Custom Aspect Ratio'.
Enter 16 for width and 9 for height.
Next, select the crop area.
Be mindful when selecting the crop area to maintain the artwork's focus and balance.
Click 'Apply' to crop the image.
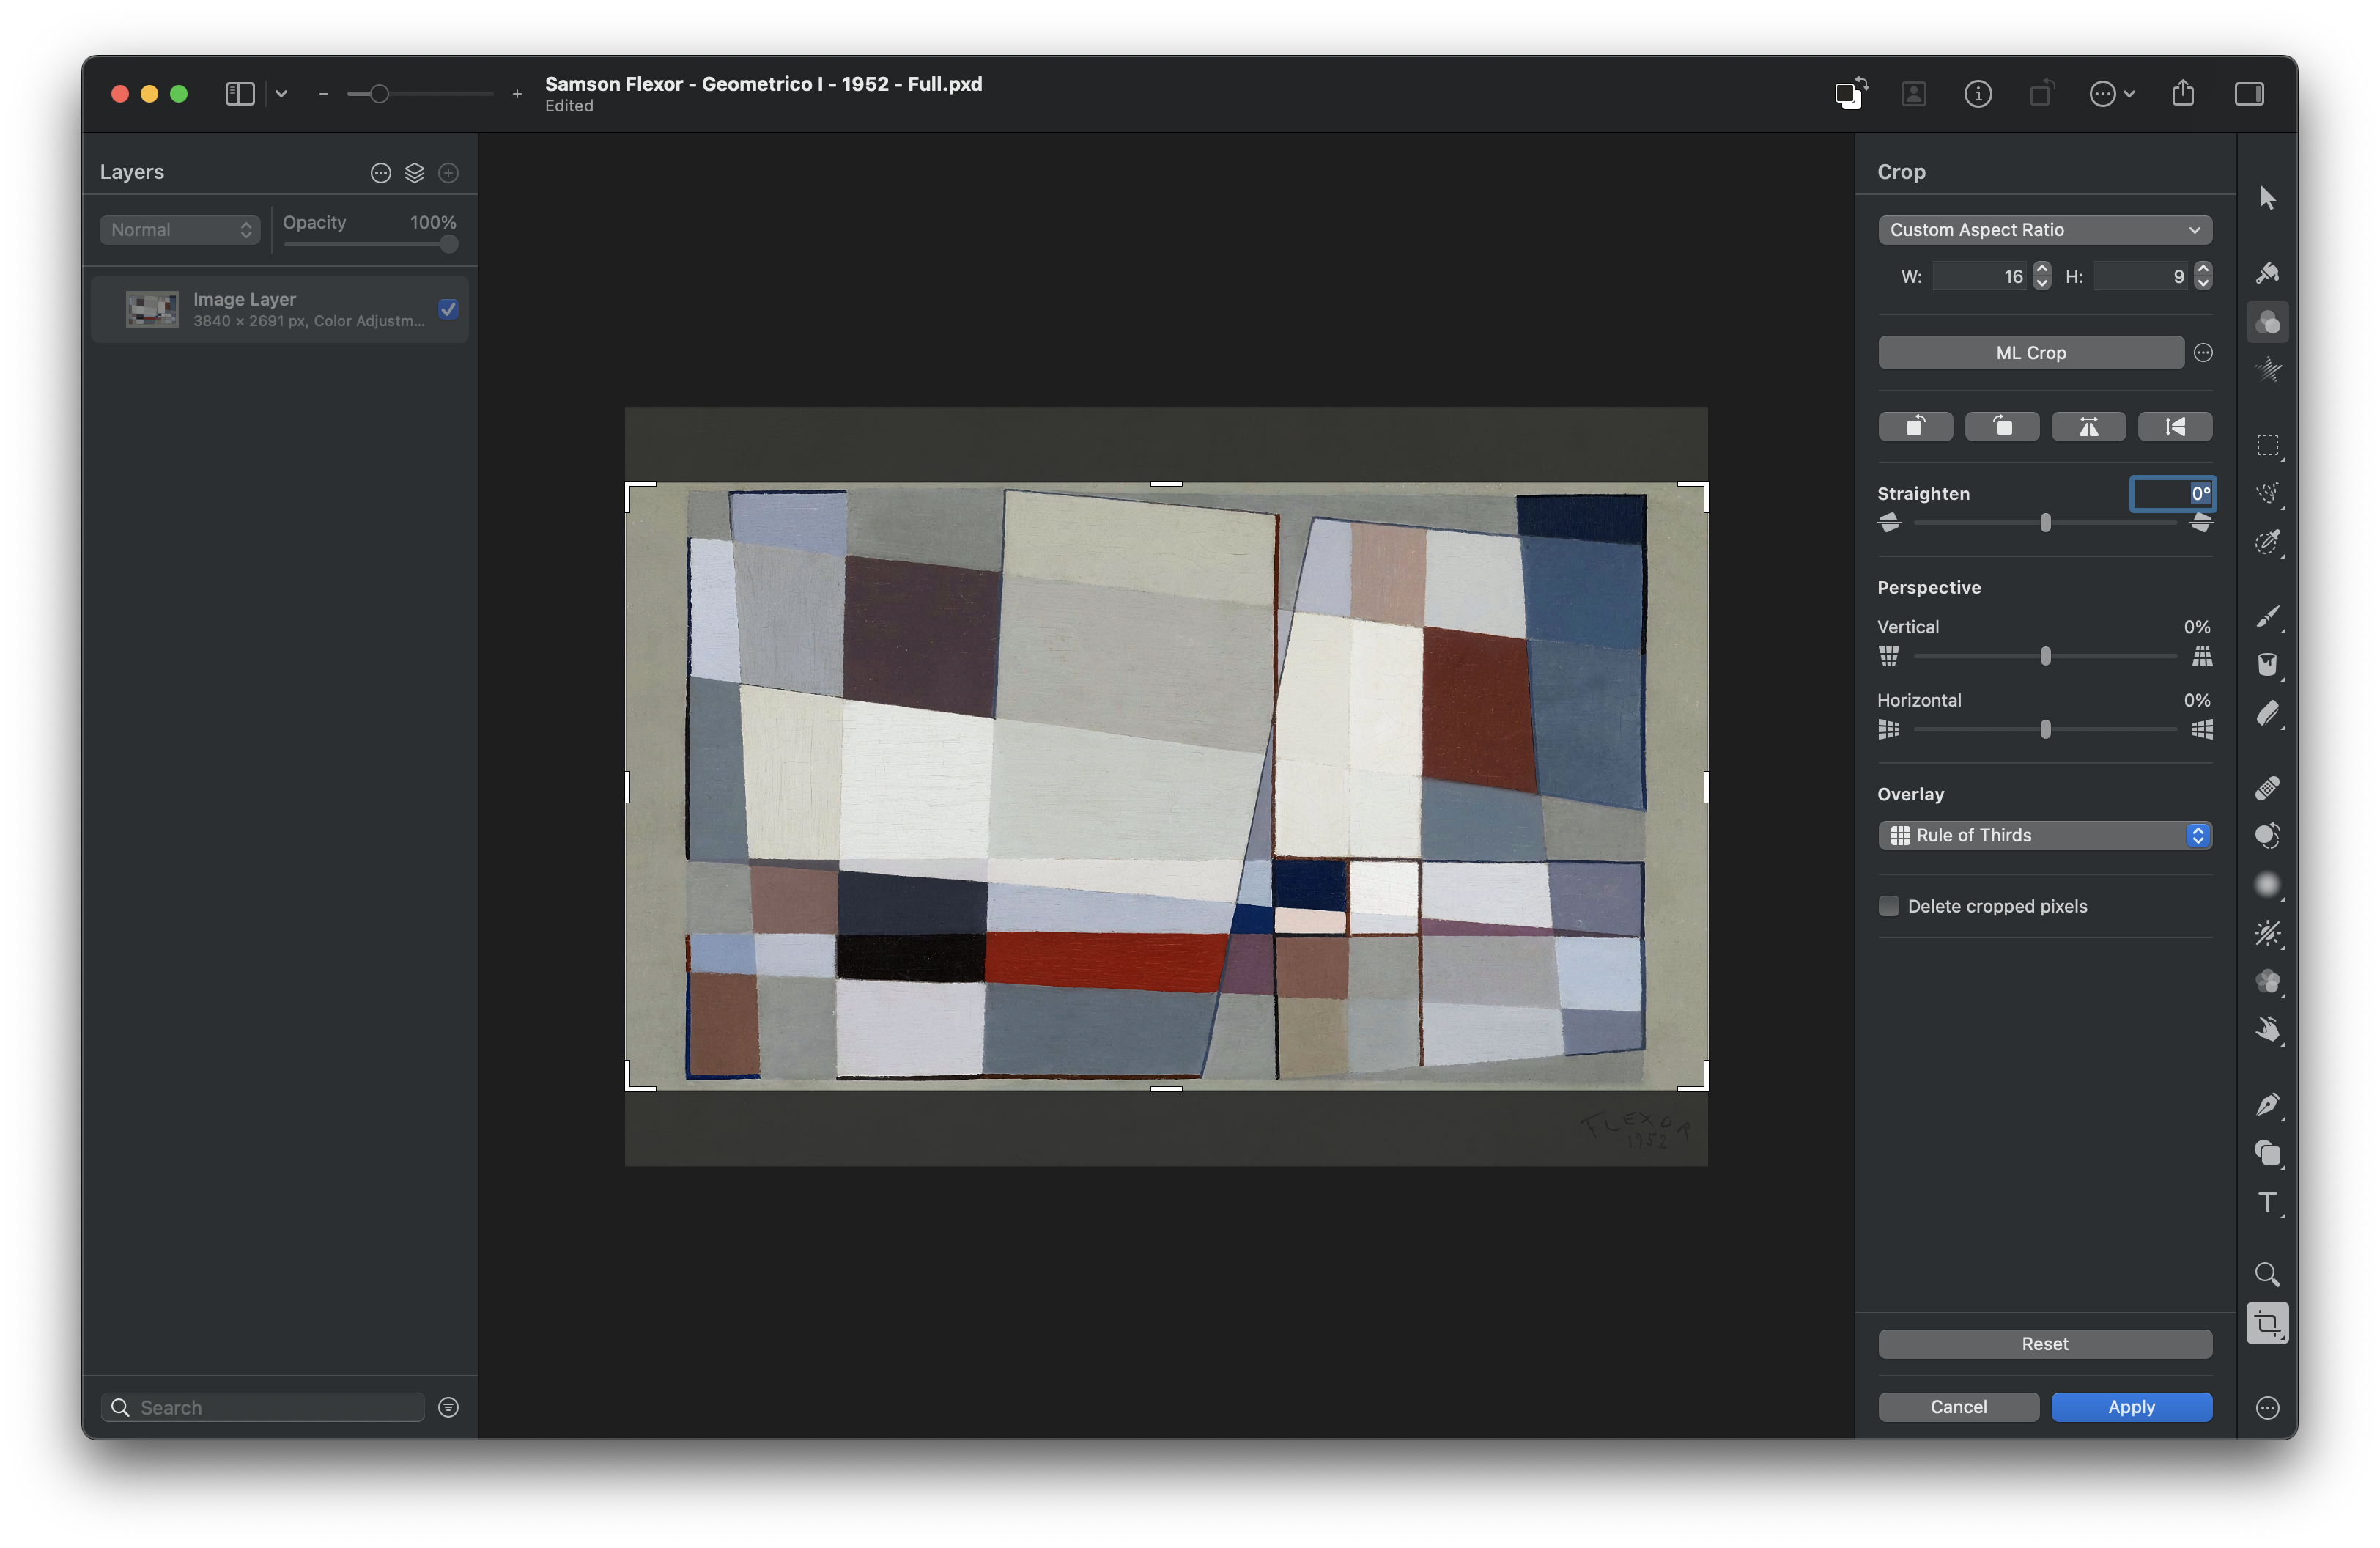
For ‘Geometrico I’, we decided to keep the painting’s border to preserve its original composition.
6. Exporting Your Final Piece for The Frame TV
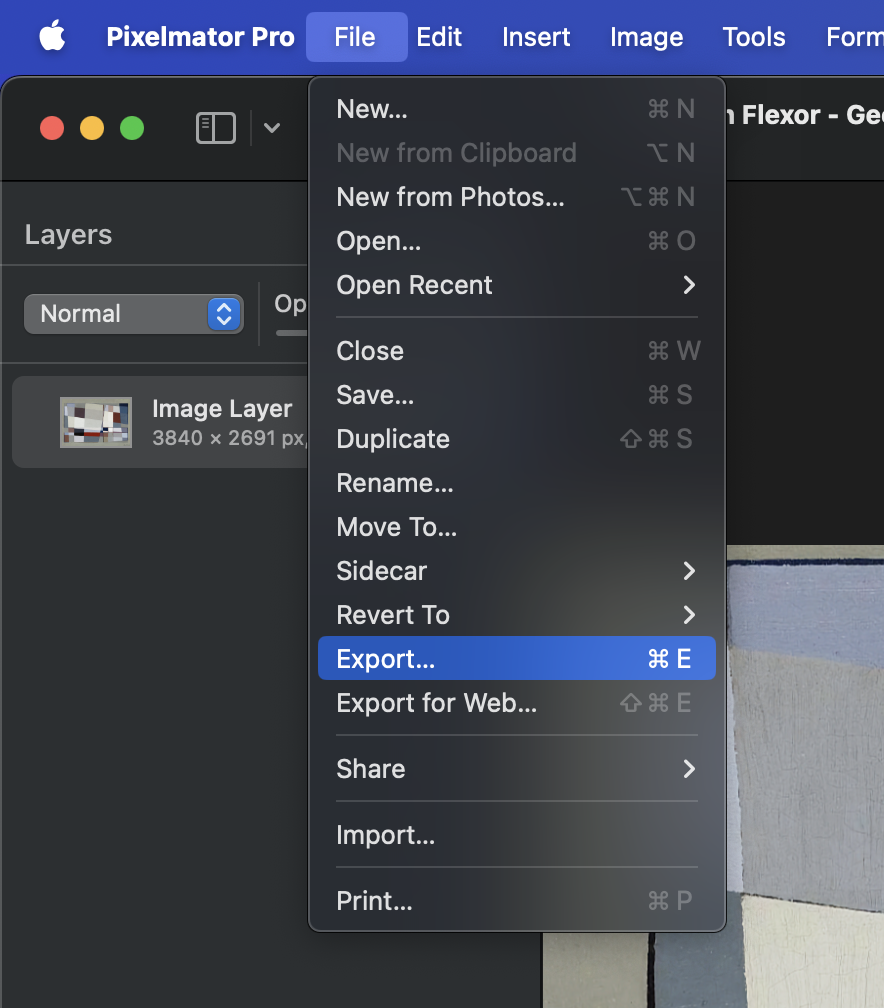
Export the image.
When satisfied with the image, go to the 'File' menu and select 'Export…'.
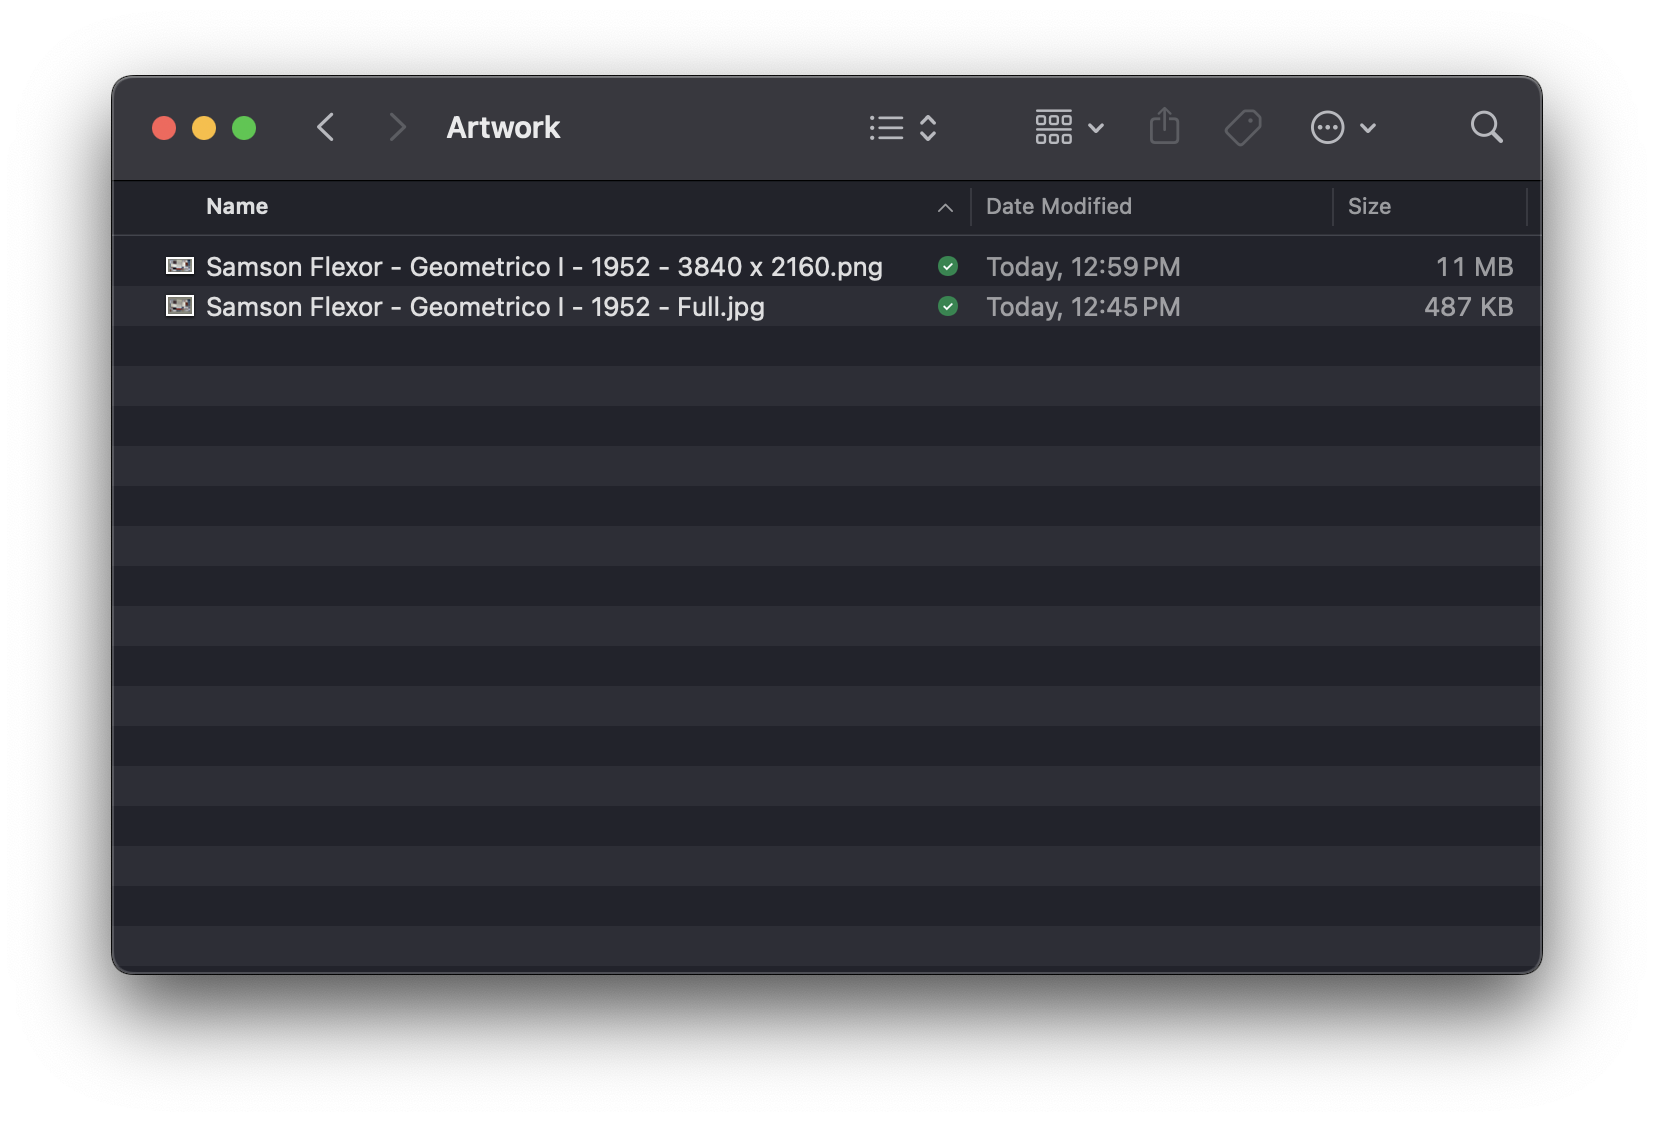
You have two format options: PNG for a lossless, larger file or JPEG for a smaller file with some compression. The choice depends on your preference for file size versus image quality. PNG is ideal for preserving every detail, while JPEG is more space-efficient.
Choose your export format: JPEG or PNG.
Check the export dimensions.
Ensure the final dimensions are displaying as 3840 × 2160 pixels.

Preview the exported file to confirm that the image appears as desired, with no unexpected cropping or quality loss.
By following these steps, you’ll have an artwork file that’s not only technically compatible with The Frame TV, CanvasTV, and other 4K art TVs, but also visually striking. This process, while technical, allows for creative discretion at every step, ensuring that the final output is uniquely yours and ready to enhance the ambiance of your living space.
Transferring and Displaying Your Art on The Frame TV
Once your artwork is ready and exported, the next step is to bring it to life on your Frame TV. There are two primary methods to transfer your art to The Frame TV: using a USB drive or the Smart Things app. Please see our Guide for details on both methods.
Skip the Technical Hassle: Professionally Curated Artwork
Overwhelmed by the technical details? Save hours of editing and ensure perfect display with our Frame TV-Ready Artwork Collection.
- Professionally optimized for 4K resolution
- Perfectly sized 16:9 aspect ratio
- Meticulously color-corrected
- Instantly downloadable
- Guaranteed compatibility with The Frame TV and CanvasTV
Tips and Best Practices
As we have seen, creating the perfect art for your Frame TV is both an art and a science. Here are some tips to ensure your artwork not only looks stunning but also resonates with your personal style:
Test Different Artworks: Experiment with various styles and themes. What works in a digital format might have a different impact when displayed on The Frame TV.
Consider Room Lighting: The Frame TV adjusts its brightness based on ambient light. Test your artwork under different lighting conditions to see how it looks throughout the day.
Regular Updates: Keep your artwork collection fresh by rotating new pieces periodically. This keeps the display dynamic and engaging.
Custom Matting: Utilize The Frame TV’s matting options to complement your artwork and add an extra layer of sophistication.
Conclusion
Creating and displaying custom artwork on Samsung’s The Frame TV or Hisense’s CanvasTV is a rewarding experience that adds a personal touch to your living space. By following the steps outlined in this guide, you can transform your TV from a mere electronic device into a dynamic art piece that reflects your personal taste and enhances your home’s ambiance.
Whether you’re refining an existing piece of art or creating something new, the possibilities are endless. Dive into this creative journey and see how your artwork can bring a new dimension to your living space. Remember, your TV is more than just a screen—it’s a canvas waiting for your personal touch.
Subscribe for 30% off!
Sign up for an exclusive offer.
You can unsubscribe at any time.
Related Posts

Guide to Uploading Custom Artwork to The Frame TV
Learn two easy methods to upload digital artwork to your Samsung Frame TV using a USB drive or the SmartThings app. S...
The Best Sources for Free Art for Frame TV and CanvasTV
Discover the best sources for free art to enhance your Frame TV and CanvasTV. Explore diverse styles and download stu...
How to Display Art on a TV
Tired of blank screens when your TV isn't in use? Learn five simple ways to transform your television into a stunning...
Tech Meets Art: Integrating Smart TVs into Home Decor
In the modern home, technology and art aren't just coexisting; they're merging. Smart TVs like The Frame by Samsung h...
Blog Categories
Popular Posts
Product Tags
- Holidays
- Seasons
- Artists
- Subjects
- Aerial
- Angels
- Animals
- Architecture
- Beach
- Birds
- Boats
- Buildings
- Cats
- Cityscape
- Clouds
- Deer
- Fashion
- Fireworks
- Fish
- Floral
- Flowers
- Food & Drink
- Forests
- Fruit
- Horses
- Landscape
- Lighthouses
- Moon
- Morning
- Mountains
- Music
- Nature
- Night
- Ocean
- Patterns
- People
- Plants
- Religion
- Roads
- Sand
- Skeletons
- Skulls
- Sky
- Snow
- Sports
- Stars
- Still Life
- Sunrise
- Sunset
- Travel
- Trees
- Water
- Waterfalls
- Places
- Colors
- Aesthetic
- Art Styles
- Mediums
- Time Periods
